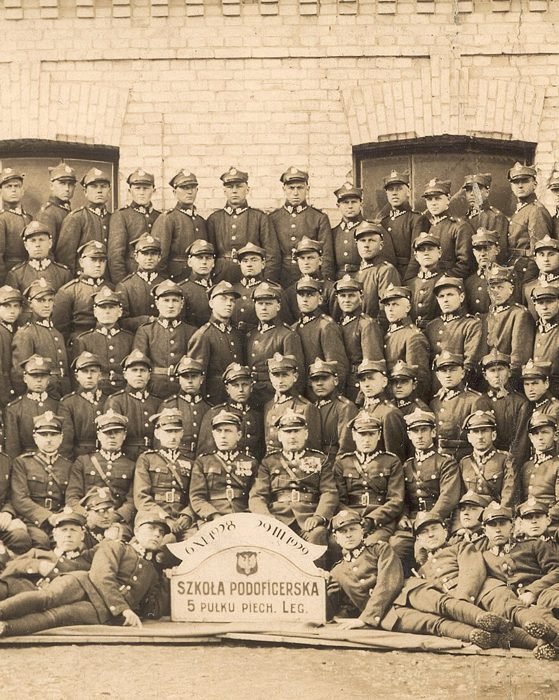
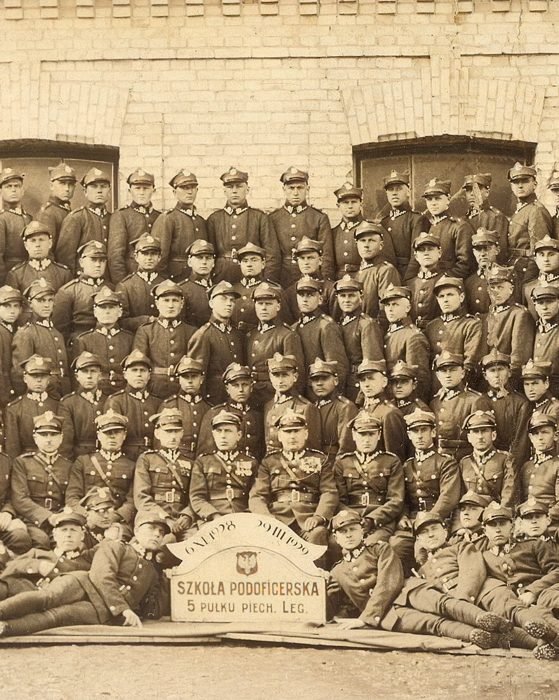
How to colorize black and white photos: the short answer
To colorize black and white photos on iPhone, first preserve the original and create a sharp, evenly lit digital working copy. Repair large scratches or torn areas, save that restored monochrome version, then open the copy in RenewShot, choose Colorize, and compare the generated image with the source.
Save the result as a new file and identify it as colorized. The new hues may be visually plausible, but a grayscale photograph does not contain enough information to prove every original color.
Keep three versions: the untouched master, a repaired black-and-white copy, and a clearly labeled colorized interpretation.
Choose the right photo and set expectations
This workflow is for family historians, photo collectors, and anyone curious to see an old monochrome image interpreted in color. It works best when the photograph contains visible subjects and reasonably clear boundaries between faces, clothing, objects, and background.
Colorization does not physically conserve the print and does not establish historical fact. It creates a derivative image. If the original is cracked, flaking, stuck to glass, or unusually valuable, avoid forceful cleaning or flattening. The U.S. National Archives preservation guidance advises against household cleaners, heat, water, or solvents and recommends professional help for repairs when needed.
Protect the original photograph
Begin with the physical photograph, not the effect you want to create. Handle a stable print by its edges with clean, dry hands, and place it on a clean surface. Do not write on the back with a hard point, add adhesive tape, or try to peel a photograph away from glass.
Digitization creates access copies, but it does not make the physical original disposable. The National Archives guide to digitizing family papers and photographs specifically recommends keeping originals because storage devices and digital files can fail or become obsolete.
Before processing anything, duplicate the best digital file you have. Mark one as the master and do not edit it. Every crop, restoration, and colorization should happen to a working copy.
Make a clean digital working copy
A flatbed scanner is useful for a stable, loose print because it keeps the image square and lighting consistent. Place the whole photograph within the scan area rather than cropping off edges during capture. Avoid automatic document feeders, especially for fragile or irregular originals.
If you only have your iPhone, place the photo on a flat, neutral surface near a window with bright indirect light. Wipe the camera lens, turn off flash if it creates reflections, and hold the phone parallel to the print. Fill the frame without cutting away the paper edges, then take several images and compare sharpness at full size.
Watch for a bright rectangle reflected from a ceiling light or window. Moving the light source or changing the position of the print is usually better than tilting the iPhone, because a tilted camera turns rectangles into trapezoids and stretches faces near the edges.
Crop the working copy to the photograph itself, but do not discard the uncropped master. If a border contains a studio stamp, handwritten date, or print number, preserve a version that includes it.
Repair scratches and damage before colorizing
Look at the image in monochrome first. A long scratch across a face, a missing corner, strong fading, or a tear between two objects can confuse both visual interpretation and color boundaries. Use restoration for structural damage before adding color.
Do not automatically stack every available tool. If the photograph is already sharp and intact, you may only need Colorize. If it is soft but undamaged, modest unblurring may be more relevant than restoration. For a detailed decision process, use our guide to restoring old photos on iPhone.
| What you see | First action | Then colorize? |
|---|---|---|
| Clear image with no major damage | Keep a master; no repair required | Yes, on a copy |
| Scratches or torn-looking areas | Restore and inspect structure | After saving monochrome result |
| Soft detail from capture blur | Try a cleaner capture, then unblur if needed | After checking faces and text |
| Glare covering the subject | Recapture with different lighting | Not until glare is reduced |
| Severe flaking or photo stuck to glass | Do not force it; seek conservation advice | Only from a safe digital copy |
Inspect any restored result before moving on. If a repair changes an eye, hand, badge, or letter, return to the master and try a cleaner input. Color can make an invented structural detail feel more convincing, so this checkpoint matters.
Save the restored black-and-white version
Once the structural repair looks acceptable, save it before adding color. This black-and-white version is useful on its own and provides a clear comparison between repair and color interpretation.
Use filenames that explain the relationship between files. For example:
1928-family-picnic-master.jpg1928-family-picnic-restored-bw.jpg1928-family-picnic-colorized.jpg
Names are not glamorous, but they prevent accidental replacement of the source and help relatives understand what was changed. If you use Photos albums instead of folders, create a small album for the project and retain all three versions.
Colorize the black-and-white photo in RenewShot
Open RenewShot on your iPhone and choose Colorize. Select the repaired monochrome copy—or the clean working copy if no repair was needed—then start processing. Processing time can vary with the image and service conditions.
When the colorized version appears, begin with the overall scene. Check whether skin, sky, foliage, wood, and clothing have been separated coherently. Then zoom into the features that matter most to the photograph.
RenewShot is a black and white photo colorizer for iPhone, not a historical verification service. Its role is to generate a visual interpretation you can compare, save, and share with appropriate context.
Inspect faces, clothing, objects, and edges
Do not judge the result only as a small thumbnail. Zoom in and compare it side by side with the black-and-white source. Look first at faces and hands, where even a small boundary error is easy to notice.
Next, inspect uniforms, jewelry, signs, flags, vehicles, and recognizable products. These objects may carry specific historical colors that a colorizer cannot determine from brightness alone. A dark gray jacket might plausibly have been navy, brown, green, or black.
Check boundaries where colors can spill: hair against a wall, sleeves against a table, fingers around an object, and a person against foliage. Subtle color is not necessarily failure, and stronger saturation is not necessarily more accurate.
Evidence check: ask relatives, compare other photographs from the same event, or consult dated reference material before presenting a specific color as fact.
If the result contains distracting patches, return to the working copy. A sharper capture, repaired scratch, or tighter crop may provide clearer boundaries. Some ambiguity remains unavoidable because the source itself does not record complete color information.
Save and label the colorized copy
Save the generated image as a new file rather than overwriting the restored monochrome version. Add “colorized” to the filename, caption, or album description. If you post the image publicly, a short note such as “digitally colorized interpretation” gives viewers the right context.
Back up the master and finished versions in more than one place you control. Digital preservation is an ongoing process: a file on one phone or one storage device is easier to lose than a file with a second copy.
When preparing a display, consider printing a copy and storing the original away from strong light. The National Archives guidance on displaying family archives recommends displaying copies when possible and limiting light exposure for originals.
How accurate is black-and-white photo colorization?
A monochrome photograph records lightness values. Different colors can produce similar gray tones, particularly under different film stocks, filters, lighting, and aging conditions. A colorizer therefore relies on patterns learned from visual examples and on cues in the image.
Some cues are stronger than others. Clear sky and foliage provide familiar context, while a uniform, painted wall, fabric, or automobile may have many plausible colors. Skin tones also vary widely and can be affected by exposure, paper aging, and the original photographic process.
Use the result according to your purpose. For a creative family keepsake, a plausible interpretation may be exactly what you want. For an archive, publication, military identification, museum record, or other historical claim, retain the original and identify the derived image clearly.
One genuine before-and-after example cannot predict results for every photograph. Image condition, subject size, contrast, damage, and capture quality all affect what the tool has available to interpret.
Seven common photo colorization mistakes
- Editing the only file. Duplicate the master before cropping, restoring, or colorizing.
- Using a glare-filled capture. Recapture the print in indirect light instead of asking software to interpret a reflection.
- Colorizing across severe damage. Repair prominent tears and scratches first, then inspect the monochrome result.
- Assuming vivid means accurate. Saturation is a style characteristic, not evidence.
- Ignoring small historical details. Inspect uniforms, flags, signs, medals, and branded objects separately.
- Replacing the restored black-and-white copy. Keep it as an independent stage of the project.
- Sharing without a label. Tell viewers that the color image is a digital interpretation.
Final colorization checklist
That is the complete answer to how to colorize black and white photos responsibly on iPhone: protect the source, improve the working copy, separate restoration from colorization, inspect the interpretation, and keep every important stage.
Questions about colorizing old photos
Can AI identify the original colors in a black-and-white photo?
Not with certainty. A black-and-white image records brightness, not a complete record of hue. A colorizer uses visual context to generate plausible colors, so the result should be treated as an interpretation.
Should I repair scratches before colorizing an old photo?
Repair large scratches, tears, and missing-looking areas first when they cross important subjects. Save the restored monochrome version, inspect it, and use a copy of that file for colorization.
Can I colorize a printed photo using only my iPhone?
Yes. Photograph the print in even indirect light with the iPhone parallel to the image, then crop to the paper edges. A flatbed scan can provide a more consistent working copy when one is available.
How should I save a colorized family photo?
Keep the untouched master, restored monochrome copy, and colorized copy as separate files. Include “colorized” in the filename or album note so later viewers do not mistake it for an original color photograph.
Why do some areas get uneven or unexpected colors?
Blur, glare, fading, scratches, small subjects, and unclear boundaries reduce the visual context available to a colorizer. A cleaner working copy and structural repair may improve consistency, but not every ambiguity can be resolved.
Sources and limitations
This guide separates physical preservation, digital restoration, and generated color because each changes a photograph in a different way. RenewShot's example images were reviewed as a before-and-after pair; no claim is made that the generated colors reproduce the historical scene exactly.